
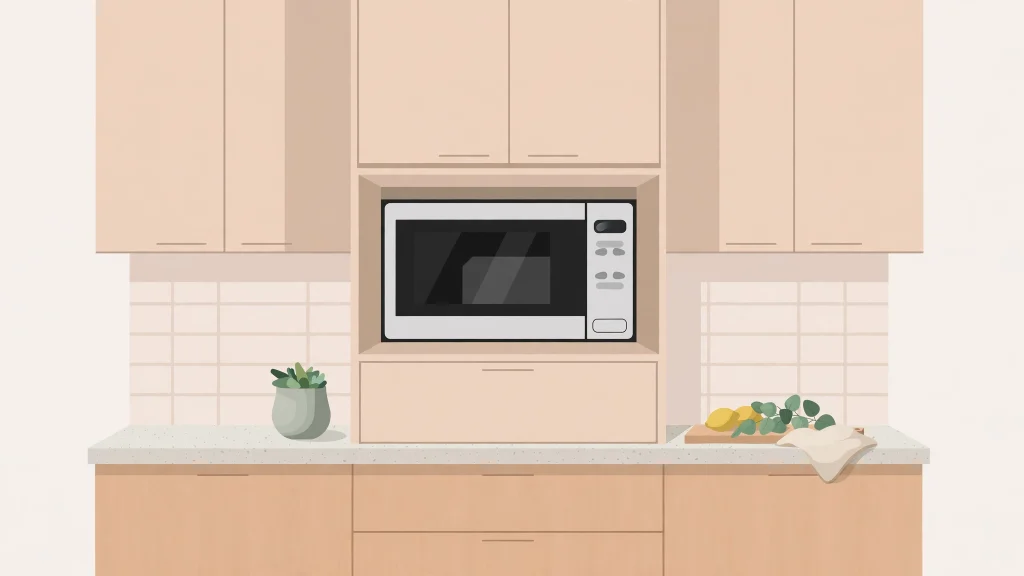

Built in microwaves have quietly become one of the most popular kitchen upgrades, and it is easy to see why. They free up counter space, give the kitchen a clean, finished look, and put the microwave at a comfortable height instead of tucked in a corner or balanced on top of the fridge. But they are also a bigger decision than a countertop model: the size has to match your cabinetry, the installation needs proper ventilation and power, and the price can vary widely. This guide covers the different types of built-in microwaves, the sizes available, what installation actually involves, how much you should expect to pay, and how to choose the right model for your kitchen.
A built-in microwave is a microwave designed to be installed into cabinetry, a wall unit, or over a built-in oven, rather than sitting on a worktop. Most use a trim kit, a frame that fills the gap between the microwave and the cabinet opening so the finished result looks like part of the kitchen. Some models are designed for a drawer-style installation under the counter, and others combine a microwave with a conventional oven in a single wall unit. Because they are fixed in place, built-in microwaves are a long-term choice, so it pays to get the size and features right the first time.
Types of Built-In Microwaves
Not all built-in microwaves are installed the same way, and the type you choose affects where it goes, how much it costs, and how easy it is to use. The most common options are described below.
Built-in microwave with trim kit
This is the classic built-in microwave: a standard microwave fitted into a cabinet or wall unit with a matching trim kit. The trim kit frames the front and hides the gap, and the microwave itself usually sits at eye level or just above the counter. This is the most flexible option because trim kits come in several sizes and finishes, and many countertop-style microwaves can be adapted with the right kit. It is also the easiest to replace later, since a new microwave of the same size can slot into the existing opening.
Microwave drawer
A microwave drawer sits under the counter and pulls out like a drawer, so you load food from above rather than from the front. Drawers are popular in kitchen islands and in homes where a wall microwave would be hard to reach, and they are a good choice for people who prefer not to lift heavy dishes up to chest height. They cost more than trim-kit models, and the opening mechanism means fewer size options, but for accessibility and for a streamlined look, they are hard to beat.
Over-the-range and combination models
Over-the-range microwaves are mounted above the cooker and double as an extractor hood, which saves space in small kitchens. They are not strictly built-in in the cabinet sense, but they are fixed in place and often discussed alongside built-in models. Combination microwave ovens, meanwhile, pair microwave cooking with a convection or grill function, letting one appliance do the work of two. They cost more and need a larger cabinet opening, but they suit cooks who want extra versatility without giving up a second appliance.
Built-In Microwave Sizes and Dimensions
Size is the first thing to get right, because a built-in microwave has to fit a fixed opening. Measure the width, height, and depth of your cabinet space before you shop, and check the manufacturer’s installation manual for the exact cut-out dimensions and the ventilation clearances. Most built-in microwaves are designed around three common widths.
- 24-inch models: compact units, usually 0.9 to 1.2 cubic feet, suited to smaller kitchens and flats
- 27-inch models: the most common size, usually 1.2 to 1.6 cubic feet, a good balance for family kitchens
- 30-inch models: the largest domestic size, usually 1.6 to 2.2 cubic feet, for large families and frequent cooking
Capacity is measured in cubic feet, and it matters more than it sounds. A 1.2 cubic foot microwave handles most plates and bowls, but if you regularly heat large casserole dishes or use a turntable for family meals, a 1.6 cubic foot model is more practical. Also check the internal height and the turntable diameter, since a tall jug or a wide dish can be more limiting than the stated capacity. Depth is often overlooked: a microwave that sticks out past the cabinet front looks unfinished, while one set too deep is awkward to load. Leave the manufacturer’s recommended ventilation gap, usually a few centimetres around the sides and back, because built-in microwaves need airflow to stay cool and reliable.
Installing a Built-In Microwave
Installation is where a built-in microwave differs most from a countertop model. A countertop microwave plugs in and works; a built-in one needs a prepared cabinet, a suitable electrical supply, and proper ventilation. Many people hire a professional for this part, and for good reason: a poor installation can damage the appliance, void the warranty, or create a safety risk. That said, understanding the process helps you plan the job, talk to your installer, and spot problems early.
Electrical requirements
Most built-in microwaves need a dedicated electrical circuit, usually a standard socket on its own circuit, because they draw a lot of power when running. The microwave’s manual will state the required voltage and amperage; in most homes this means a normal socket, but it should not share the circuit with other large appliances. The socket should be accessible behind or beside the cabinet, not buried where you cannot reach it. If your kitchen has no suitable socket in the right place, an electrician will need to add one before the microwave goes in, so factor that into your budget and timeline.
Ventilation and clearances
Built-in microwaves generate heat, and they need somewhere for that heat to go. The installation manual will specify clearances around the unit, typically a few centimetres at the back and sides and space above for the trim kit’s vents. Never block these vents, and never install a built-in microwave inside a sealed cabinet with no airflow. Some trim kits include a vent at the front, while others rely on gaps around the frame. If the cabinet is enclosed on all sides, your installer may need to add ventilation slots. Getting this right matters: poor ventilation is one of the most common causes of early microwave failure.
Step-by-step installation overview
First, the cabinet opening is measured and, if necessary, adjusted so the cut-out matches the manufacturer’s dimensions. A support shelf or mounting brackets are fitted inside the cabinet to carry the microwave’s weight. The microwave is then slid into place, levelled, and secured with the fixings supplied, and the trim kit is attached around the front to close the gap neatly. Finally, the appliance is plugged in, tested on a short cycle, and checked for level and for any rattling. If you are replacing an existing built-in microwave, the job is usually simpler, because the opening, shelf, and socket are already there; measure carefully, though, because a new model even a centimetre wider may not fit the old opening.
Features Worth Paying For
Microwave features range from genuinely useful to marketing extras. Power is the first thing to check: look for at least 900 watts for family cooking, and 1,000 watts or more if you cook a lot. Sensor cooking, which adjusts the time based on the steam coming off the food, is genuinely helpful and avoids the guesswork of reheating. A convection or grill combination adds baking and browning, and is worth it if you plan to use the microwave as a second oven. A child lock is essential in homes with small children, and a quiet or mute function is a small luxury that families appreciate. Interior lighting, a large turntable, and easy-clean coatings make daily use more pleasant. By contrast, dozens of preset programmes and smart-home connectivity are nice to have but rarely decide whether a microwave is good.
Think about the door, too. A left-hinged, right-hinged, or drop-down door changes how the microwave fits your kitchen layout, and a drawer model removes the door question entirely. Finish matters for the look of the kitchen: stainless steel is the most common and the easiest to match with other appliances, while black stainless steel, white, and panel-ready finishes suit different kitchen styles. A matching trim kit is usually available in the same finish, so buy the kit designed for your exact model rather than a generic one.
How Much Do Built-In Microwaves Cost?
Prices vary widely. A basic trim-kit built-in microwave costs roughly $300 to $600, a mid-range model with sensor cooking and a good trim kit runs $600 to $1,000, and premium combination models and microwave drawers often cost $1,000 to $2,000 or more. Installation adds to this: a straightforward replacement in an existing opening may cost $100 to $200, while a new installation needing cabinet work or a new electrical socket can add $200 to $500 or more. A trim kit alone typically costs $100 to $250, and it is often sold separately, so check whether it is included before you compare prices. All in, a typical built-in microwave project costs $500 to $1,500, which is a meaningful saving against remodelling the kitchen, and the result usually adds to the home’s appeal. When you plan the wider kitchen, it helps to think about the whole room at once, as in a guide to designing a functional kitchen, where the microwave’s position is planned around how you actually cook.
How to Choose the Right Built-In Microwave
Choosing well comes down to a short checklist. Measure your cabinet opening first, including the depth, and write the numbers down before you look at models. Decide on the type: trim kit, drawer, or combination unit. Choose a capacity that fits your household, aiming for at least 1.2 cubic feet for a family, and check the power rating. Confirm that the trim kit for your chosen model is available in your finish, and check the warranty and the availability of spare parts. Finally, get a quote for installation before you buy, so the total cost is clear and there are no surprises.
If you are remodelling the whole kitchen, decide on the microwave early, because its size and position affect the cabinet design. A built-in microwave is often part of a wider project, so it is worth reading about kitchen remodelling costs, steps, and ideas before you commit, so the appliance, the cabinets, and the budget all line up. And if you are replacing an existing model, keep the old manual: the cut-out dimensions and ventilation requirements in it will tell your installer exactly what the new model has to match.
Looking After Your Built-In Microwave
A built-in microwave lasts longer with simple care. Wipe the interior after use with a damp cloth to stop food splatters baking onto the walls, and clean the door seal regularly so it keeps sealing properly. For stubborn smells, heat a bowl of water with lemon slices for a few minutes, then wipe the interior down. Keep the ventilation vents clear of dust, and never cover them. If the turntable stops turning or the door does not close cleanly, stop using the microwave and have it checked, because a damaged door seal can leak microwave energy. Like other kitchen appliances, it also benefits from regular cleaning alongside the rest of the kitchen: learning how to clean a dishwasher is a good reminder that all your built-in appliances last longer when they are cleaned properly and regularly. With basic care, a good built-in microwave should serve your kitchen for eight to ten years.
Frequently Asked Questions About Built-In Microwaves
Can any microwave be built in?
No. Only microwaves designed for built-in use, or countertop models with a matching trim kit approved by the manufacturer, should be installed in a cabinet. A standard countertop microwave installed without the right kit and ventilation can overheat and is a safety risk.
What size built-in microwave do I need?
Most family kitchens suit a 27-inch model with 1.2 to 1.6 cubic feet of capacity. Smaller kitchens and flats often suit a 24-inch model, while large households that heat big dishes should consider a 30-inch model with 1.6 cubic feet or more.
Do built-in microwaves need a trim kit?
Yes, in most cases. The trim kit fills the gap between the microwave and the cabinet, gives the installation its finished look, and provides the ventilation the microwave needs. Always buy the trim kit made for your exact model.
How much does it cost to install a built-in microwave?
A simple replacement in an existing opening typically costs $100 to $200. A new installation that needs cabinet work or a new electrical socket usually adds $200 to $500 or more, on top of the cost of the microwave and trim kit.
Are microwave drawers worth it?
Microwave drawers are worth it if you value accessibility, a clean countertop, and a streamlined look, especially in a kitchen island. They cost more than trim-kit models and offer fewer size choices, so they suit buyers who are willing to pay extra for convenience and design.