
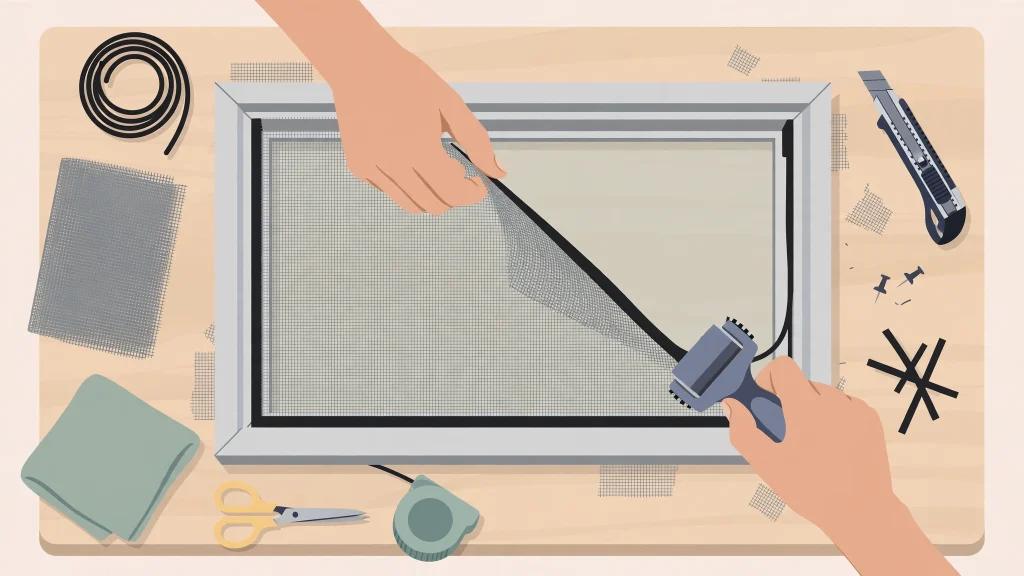

A torn window screen is one of those small home problems that quietly grows into a bigger one. A tiny hole lets in mosquitoes, flies, and dust, and it only takes one storm, one curious pet, or one careless push to turn that pinhole into a rip you cannot ignore. The good news is that window screen repair is one of the most approachable do-it-yourself jobs in the home. Most screens can be fixed in under an hour with a handful of inexpensive tools, and even a complete rescreening costs far less than calling a professional or replacing the whole window. This guide walks you through everything you need to know: how to tell whether a screen can be patched or needs new mesh, the tools and materials to buy, the step-by-step repair process, what the job should cost, and how to keep your screens in good shape for years.
Window screens do more than keep insects out. They soften harsh sunlight, reduce dust and pollen drifting indoors, and protect your windows from debris. A damaged screen also makes a window look neglected, which matters if you are selling or renting your home. Learning basic window screen repair saves money, but it also gives you control: you can fix a tear on a Saturday morning instead of waiting days for an appointment, and you can choose better mesh that lasts longer than the original. If you can use a screwdriver and a utility knife, you can do this job.
Signs Your Window Screen Needs Repair
Inspect your screens at least twice a year, ideally in spring before insect season and again in autumn before you store or close up windows for winter. Hold a light behind the screen or look through it toward bright daylight; holes and thinning spots show up clearly. Small tears near the frame often come from the spline drying out and shrinking, while holes in the middle usually mean a pet claw, a hailstone, or something pushed through the mesh. If the frame itself is bent, cracked, or corroded, the mesh may not be your only problem, and you should check whether the frame can be straightened or needs replacing.
- Visible holes, tears, or frayed edges in the mesh
- Sagging or loose mesh that no longer sits tight in the frame
- Spline that is brittle, cracked, or popping out of its groove
- A frame that rattles, sticks, or will not sit square in the window
- Insects or dust getting in even when the window is closed
As a rule, holes smaller than about 7 centimetres across can be patched, while larger tears, widespread brittleness, or mesh that has gone grey and fragile from years of sun exposure call for a full rescreen. Patching is quick and nearly invisible on small damage; rescreening gives you a like-new screen and is still a cheap, beginner-friendly job. Either way, start by removing the screen from the window so you can work on a flat surface.
Tools and Materials for Window Screen Repair
You do not need a workshop full of equipment. Most of what you need is available at any hardware store for a few dollars, and a basic repair kit often bundles the spline, mesh, and roller together. Buy mesh slightly larger than your frame on every side so you have material to grip and trim, and match the spline diameter to your frame’s groove: too thin and the mesh will pull out, too thick and it will not seat properly. If you are unsure, take a short piece of the old spline to the store and compare it.
- Replacement screen mesh (fibreglass is standard; aluminium is stronger)
- New rubber spline in the right diameter, plus spare spline
- Spline roller tool, with a convex wheel on one end and a concave wheel on the other
- Utility knife with a fresh blade, or a sharp craft knife
- Flathead screwdriver or spline pick to lift out the old spline
- Scissors, a tape measure, and a flat work surface such as a table
- Self-adhesive screen repair patches, for quick fixes to small holes
- Cleaning cloth and mild soapy water for the frame
Before you buy, measure the frame’s width and height and check the mesh type. Standard fibreglass mesh keeps out most insects and is easy to work with, which makes it the best choice for a first repair. Aluminium mesh resists dents and pet claws better but creases if you bend it, so handle it carefully. There are also finer meshes for keeping out tiny midges, pet-resistant heavy mesh, and solar mesh that blocks more heat. For most homes, ordinary fibreglass mesh in charcoal grey is the right balance of visibility, airflow, and price, and it hides dirt better than bright silver mesh.
How to Patch a Small Hole in a Window Screen
Patching is the fastest window screen repair, and it is the right choice for holes up to a few centimetres across, especially if the rest of the mesh is still strong. Start by cleaning the area around the hole with a damp cloth so the patch can stick properly, and let it dry completely. If you are using a self-adhesive patch, trim it so it overlaps the hole by at least a centimetre on every side, press it firmly onto the outside of the screen, and smooth out any air bubbles. A second patch on the inside makes the repair stronger and less noticeable, and it stops the edges from peeling in wind or rain.
For a neater, longer-lasting patch, cut a square of matching mesh slightly larger than the hole and unravel a few strands around its edges so you can weave them into the existing screen. Lay the patch over the hole, thread the loose strands through the surrounding mesh with a needle or a fine hook, and trim the ends flush. A dab of clear nail polish or screen repair adhesive on the edges stops fraying. This woven patch is almost invisible from a few steps away and will last as long as the screen itself. Whichever method you choose, check the repair after the first heavy rain; a patch that has lifted can be pressed down again or replaced in minutes.
How to Rescreen a Window Frame Step by Step
Rescreening sounds technical, but it follows a simple rhythm: remove the old mesh, lay the new mesh over the frame, press the spline into the groove to hold it, and trim the excess. Work on a flat table, take your time with the first side, and the rest of the job goes quickly. Keep the mesh square to the frame as you work, because a crooked start shows up as wrinkles you cannot easily remove later.
Step 1: Remove the screen and the old spline
Lift the screen out of the window. Most screens have small tabs or springs on the sides; pull the tabs in or press the frame gently toward one side to free it. Lay the frame flat and use a flathead screwdriver or a spline pick to lift one end of the old rubber spline out of its groove, then pull the spline out all the way around and discard it with the old mesh. Clean the groove and the frame with soapy water and let it dry. If the frame is bent, lay it on a flat surface and gently straighten it by hand before you start.
Step 2: Cut and position the new mesh
Unroll the new mesh over the frame, leaving at least 2 to 3 centimetres of extra material on every side. Line up one straight edge of the mesh with one side of the frame so the weave runs parallel to the frame; this keeps the finished screen square and tidy. Do not stretch the mesh yet. A small weight or a roll of tape at the corners can stop it sliding while you work, but your hands will do most of the holding.
Step 3: Roll the spline into the groove
Starting at a corner, lay the new spline over the groove and use the convex wheel of the spline roller to press it into the groove, trapping the mesh underneath. Work along one side, keeping gentle tension on the mesh so it stays flat but not so much that it bows the frame inward. At each corner, cut the spline neatly and continue around the frame, using the concave wheel to push the spline fully home. When you reach the starting corner, trim the spline so the two ends meet snugly without overlapping. If the mesh wrinkles, lift the spline out of that section with a screwdriver and redo it; fibreglass mesh forgives a second attempt.
Step 4: Trim the excess and refit the screen
Once the spline is seated all the way around, trim the excess mesh with a sharp utility knife, holding the blade at a slight angle against the outside of the frame and cutting in one smooth pass. A fresh blade matters here: a blunt one tears the mesh and leaves a ragged edge. Brush off any loose strands, check the screen for wrinkles or loose spots by pressing gently in the centre, and then refit it in the window. The screen should sit snugly without rattling. If it is loose, the frame may have bowed during rescreening; check that the spline is fully seated and that you did not pull the mesh too tight on one side.
That is the whole job. A first rescreening usually takes 30 to 45 minutes, and with practice most people finish in 20. If you have several screens to do, cut all the mesh first and work through them one at a time; your technique improves with each frame. And if your home has other window hardware giving trouble, the same patient approach applies to repairing a broken window lock, where cleaning, alignment, and a few replacement parts usually solve the problem.
How Much Does Window Screen Repair Cost?
Window screen repair is cheap compared with almost any other home repair, which is one reason it is worth learning. A do-it-yourself patch costs almost nothing: a pack of self-adhesive patches sells for a few dollars and covers several small holes. A full DIY rescreening of a standard window usually costs between $15 and $40 in materials, depending on the mesh type and the size of the frame. A roll of fibreglass mesh and a length of spline are inexpensive, and the spline roller is a one-time purchase of around $5 to $10 that you will reuse for every screen in the house.
Hiring a professional changes the picture but still keeps the job affordable. A mobile screen repair service typically charges $25 to $60 per screen for a standard rescreen, plus a call-out fee in some areas, while a screen taken into a hardware store or glass shop often costs $20 to $40. Large screens, custom shapes, or premium pet-resistant and solar mesh cost more. Replacing a damaged frame adds $30 to $80 or more per frame, and a full replacement window with a new screen is a different job entirely, running into hundreds of dollars. For a standard torn screen, DIY saves roughly half the professional price and takes less time than booking and waiting for a visit.
How to Make Your Window Screens Last Longer
A repaired screen will last for many years if you look after it. Clean screens twice a year with a soft brush or a cloth and mild soapy water, rinsing gently with a hose on a low setting; never pressure-wash a screen, because the force stretches and tears the mesh. In autumn, remove screens from windows you will not open in winter and store them upright in a dry place, which protects them from snow, ice, and accidental knocks. Keep pets’ claws trimmed and train them not to push against screens, and check the spline each spring: if it feels hard or brittle, replace it before it fails and lets the mesh sag. Small habits like these are what keep screens working, and the same care extends to the rest of your windows and doors. A loose or sticking screen door, for example, is often fixed with the same kind of patient adjustment described in a guide to fixing a loose screen door handle. Keeping screens intact also helps with pest control: a tight, hole-free screen is one of the simplest ways of keeping spiders out of your house without chemicals.
Frequently Asked Questions About Window Screen Repair
How long does window screen repair take?
A patch takes about five minutes. A full rescreen takes 30 to 45 minutes the first time and about 20 minutes once you have done one or two. Most of that time is removing the old spline and trimming the new mesh, not the repair itself.
Can I repair a window screen without removing it from the window?
Small patches can be applied with the screen in place, but rescreening should always be done with the frame removed and laid flat. Working on a flat surface is what lets you keep the mesh square and seat the spline evenly.
What is the best mesh for a replacement window screen?
Standard fibreglass mesh suits most homes: it is cheap, easy to fit, and keeps out common insects. Choose aluminium mesh if you need extra strength, pet-resistant mesh if you have animals that push on screens, and finer mesh if tiny midges are a problem in your area.
How do I know which spline size my window screen needs?
Remove a short piece of the old spline and take it to the hardware store to match the diameter, or measure it with callipers. The spline should press into the groove snugly with the roller; if it drops in loosely, it is too thin, and if it will not seat, it is too thick.
Is it cheaper to repair a window screen or replace it?
Repairing is almost always cheaper. A DIY rescreen costs $15 to $40 in materials, while a new screen frame from a shop costs considerably more. Replace the frame only when it is bent, cracked, or corroded beyond straightening.