
Short answer: To program a garage door opener, press the Learn button on the motor unit, then press the button on your remote within 30 seconds. The door will click or the light will blink, and the remote is programmed. The whole job usually takes less than five minutes, and the same basic process works for a remote, a wireless keypad, and the HomeLink buttons in your car. This guide explains how to program a garage door opener step by step, with the differences for LiftMaster, Chamberlain, Genie, and Craftsman, plus what to do when the remote will not pair.
Before You Start: What You Need
Most programming jobs need nothing more than a ladder and the remote or keypad. Gather these before you climb up: the remote or keypad you want to program, a sturdy ladder that reaches the motor unit on the ceiling, a fresh battery in the remote (a weak battery is the most common reason programming fails), and the opener’s manual if you have it. Find the brand and model on a label on the motor unit or the back of the remote; you will need it to identify the Learn button. Check that the door is closed and that nothing is in its path. If your opener is more than 15 years old or still uses dip switches instead of a Learn button, read the manual for the older method — and if you are shopping for a replacement, see our guide to the best garage door opener for current models. Keep your remotes, ladder, and manual in one place in the garage; our tool storage ideas can help you set up a spot for them.
How to Program a Garage Door Opener Remote: The Standard Method
Nearly every opener made since 1993 programs the same way. Follow these steps.
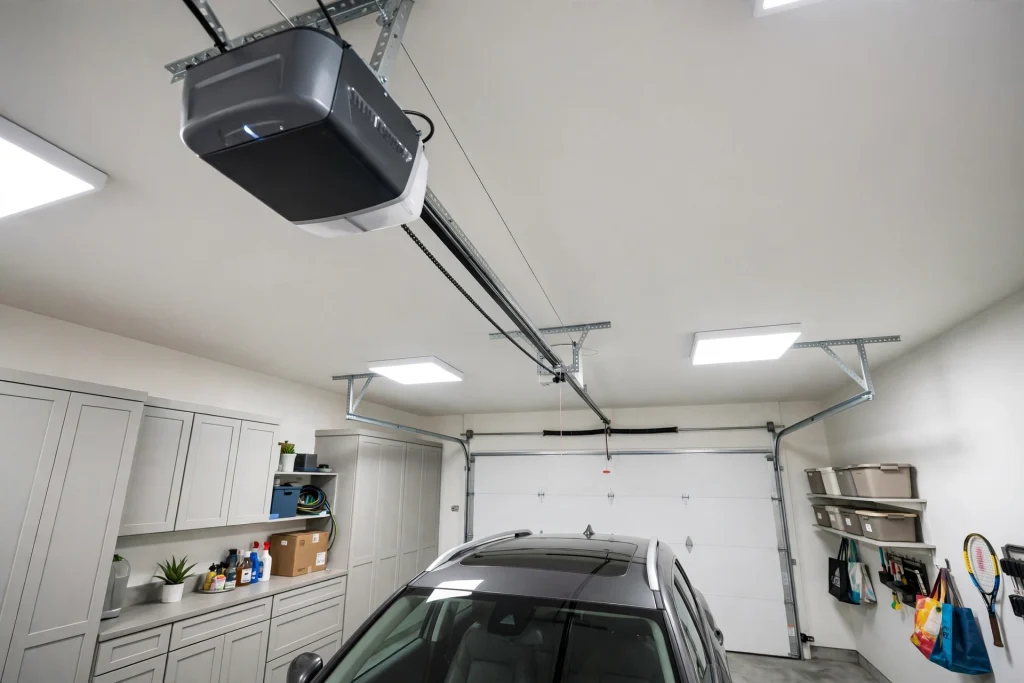
- Climb the ladder and find the Learn button on the motor unit. It is usually on the back or side, near the antenna wire, and it may be yellow, red, purple, green, or gray.
- Press and release the Learn button. The indicator light beside it will turn on and stay lit for about 30 seconds. This is your programming window.
- Within 30 seconds, press and hold the button on the remote you want to program. Hold it for one to two seconds, then release.
- Watch for the opener’s light to blink or the motor to click. That means the code was accepted.
- Press the remote button once more to test it. The door should move. If it does not, repeat the process once.
If the light does not come on when you press Learn, check that the opener has power and that the outlet works. Some models need you to press the Learn button twice for a remote and once for a keypad — check your manual.
Learn Button Colors and What They Mean
The color of the Learn button tells you which radio system the opener uses, and which remotes will work with it.
| Learn button color | Brands | System | Remote type |
|---|---|---|---|
| Yellow | LiftMaster, Chamberlain (2011 and later) | Security+ 2.0 | Tri-band 310/315/390 MHz |
| Red or orange | LiftMaster, Chamberlain (1997-2005) | Security+ | 390 MHz |
| Purple | LiftMaster, Chamberlain (2005-2010) | Security+ | 315 MHz |
| Green | Genie | Intellicode | 315 or 390 MHz |
| Gray | Genie (older models) | Dip switch | 12-position switch |
Programming by Brand
LiftMaster and Chamberlain
LiftMaster and Chamberlain are made by the same company and program the same way. Press the Learn button once — a yellow button means Security+ 2.0 — then press the remote button within 30 seconds. For MyQ-enabled openers, you can also program a remote from the myQ app by adding a device and following the prompts. If you have a purple Learn button, the opener uses the older Security+ format and needs a compatible 315 MHz remote.
Genie
Genie openers use Intellicode rolling code technology. Press the Learn button on the powerhead, then press the remote button twice, waiting for the light to blink between presses. Genie remotes also have a learn mode on the remote itself: hold the remote’s Learn button until the LED flashes, then press the opener’s Learn button. If your Genie has a row of small dip switches, set the remote’s switches to match the opener’s switches instead.
Craftsman
Craftsman openers are rebranded Chamberlain and LiftMaster units, so they follow the same steps. The Learn button is usually red or purple on older models and yellow on newer ones. Press it once, then press the remote within 30 seconds. If the model number starts with 139, it is a Chamberlain-made unit and uses Chamberlain-compatible remotes.
Older and Other Brands
Openers made before 1993, including older Stanley, Wayne Dalton, and Linear models, use dip switches. Open the remote and the motor unit, set both sets of switches to the same pattern, and the remote will work. If your opener has no Learn button and no dip switches, it may use a separate receiver that needs a replacement remote from the manufacturer.
How to Program a Garage Door Opener Keypad
Keypads let you open the door with a PIN instead of a remote, and they program through the same Learn button.
- Press the Learn button on the motor unit.
- Within 30 seconds, enter your chosen 4-digit PIN on the keypad and press Enter.
- The opener light will blink. Enter the PIN again and press Enter to confirm.
- Test the keypad by entering the PIN and pressing Enter. The door should move.
Choose a PIN you can remember but others cannot guess, and do not use your house number or birth year. If the keypad stops working, replace its battery first — a dead keypad battery is the most common cause. To change the PIN, repeat the process with the new code; the old code is replaced automatically.
How to Program HomeLink in Your Car
HomeLink buttons in your car’s mirror or visor can replace a clip-on remote.
- Turn the car on, or turn the ignition to accessory mode.
- Hold the two outer HomeLink buttons until the indicator light flashes quickly. This clears old codes.
- Hold your garage remote 1 to 3 inches from the HomeLink buttons, then press and hold both the remote button and the HomeLink button you want to use until the light changes from slow to rapid flashing.
- Climb the ladder and press the Learn button on the opener.
- Within 30 seconds, return to the car and press the HomeLink button for two seconds, release, and repeat twice more. The door should move on the second or third press.
HomeLink needs a rolling-code-compatible opener. If the car is older than the opener, you may need a HomeLink compatibility bridge, available from the opener manufacturer.
How to Program a Second Remote or Replace a Lost Remote
Programming a second remote is the same process: press Learn, then press the new remote’s button. The opener remembers multiple remotes, so the old ones keep working. If you lost a remote, erase all codes first so the lost remote cannot open your door, then reprogram the remotes you still have. See the reset section below. If you buy a universal remote, check that it supports your opener’s frequency and code type; most universal remotes list compatible brands on the box.
How to Erase All Codes and Reset the Opener
Press and hold the Learn button for about six seconds until the indicator light goes out. This erases every remote and keypad from the opener’s memory. You will need to reprogram each remote and keypad from scratch. Erase codes when you move into a new home, lose a remote, or give your old remote to someone else. A reset does not change the door’s travel limits or force settings on most models, but check your manual if the door behaves differently after a reset.
Troubleshooting: Why Your Remote Will Not Program
- Dead or weak remote battery. Replace it and try again.
- You waited too long. The Learn window lasts only 30 seconds, so have the remote in your hand before you press Learn.
- Wrong remote type. A Security+ 2.0 remote will not work with a purple-button opener, and vice versa. Match the remote to the Learn button color.
- Interference. LED light bulbs in the opener can interfere with the radio signal. Use bulbs rated for garage door openers, and while you are checking the opener’s light, look at your garage lighting as a whole — see our guide to exterior outdoor LED lights for options that work well around the garage.
- The opener’s memory is full. Some openers store only a limited number of remotes. Erase all codes and reprogram.
- The door sensors are blocked. If the door reverses or the opener light flashes, check the safety sensors at the base of the door.
Common Mistakes to Avoid
- Holding the Learn button too long. A quick press starts programming; holding it for six seconds erases all codes.
- Programming with the door open. Always close the door first so the opener can complete its test.
- Using the wall button to program. The wall control does not program remotes; use the Learn button on the motor unit.
- Forgetting to test. Always test the remote from outside the garage after programming.
- Leaving the old code active after losing a remote. Erase and reprogram for security.
Frequently Asked Questions
How do I program a garage door opener without a Learn button?
Openers without a Learn button use dip switches or a separate receiver. Match the remote’s dip switches to the opener’s, or add a universal receiver that wires into the opener.
How many remotes can I program to one opener?
Most openers store between 5 and 10 remotes and keypads. Check your manual for the exact number; if you run out of space, erase all codes and reprogram only the ones you use.
Do I need to reprogram my opener after a power outage?
No. The opener stores its codes in memory that survives power cuts. If your remote stops working after an outage, replace the battery first.
Can I program a universal remote to my opener?
Yes, if the universal remote supports your opener’s brand, frequency, and code type. Follow the universal remote’s instructions, which usually involve pressing Learn and then the remote button.
Why does my remote work sometimes but not others?
Interference, a weak battery, or a damaged antenna wire are the usual causes. Replace the battery, check the antenna, and move LED bulbs away from the motor unit.
Knowing how to program a garage door opener is a five-minute job once you know where the Learn button is. Press it, press the remote, test the door, and you are done. Keep this guide handy for the next remote, keypad, or car, and your garage will always open when you need it to.