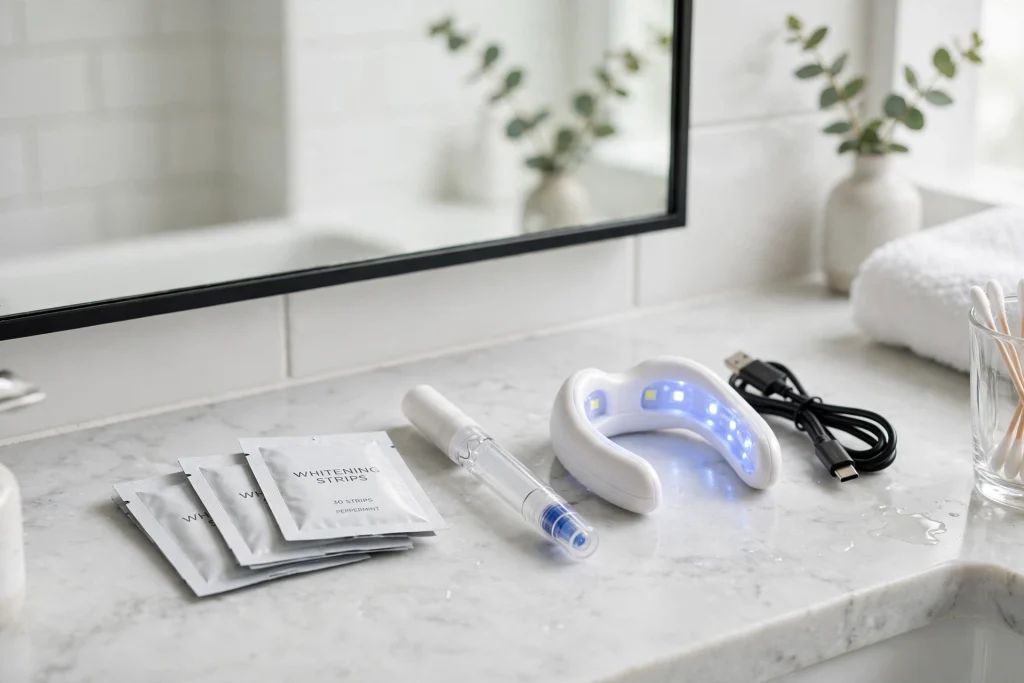

Short answer: The best at home teeth whitening kits for most people use a hydrogen peroxide gel with strips or trays that fit your teeth well, applied once a day for 7 to 14 days. A good kit lifts years of coffee, tea, and red wine stains for a fraction of the cost of an in-office treatment, and the best formulas keep sensitivity low. In this guide we compare the seven kits that deliver the most visible whitening for the money, explain how strips, trays, pens, and LED kits differ, and show you how to use them safely so your results last for months instead of weeks.
How Do At-Home Teeth Whitening Kits Work?
Every effective whitening kit uses a peroxide-based gel, usually hydrogen peroxide or carbamide peroxide, which breaks down into oxygen molecules that penetrate the enamel and break apart the stain compounds trapped inside your teeth. Hydrogen peroxide works faster and is common in strips and LED kits, while carbamide peroxide breaks down more slowly and is common in trays you wear longer, including overnight. LED and blue-light devices do not whiten teeth on their own; they warm the gel slightly and speed up the chemical reaction, which can shorten treatment time but does not change the maximum result. Whitening works best on yellow and light-brown stains from food, drink, and smoking. It will not change the color of crowns, veneers, fillings, or naturally gray-toned teeth, and it cannot fix stains caused by medication or injury. Most people see a difference of two to eight shades, with the biggest change in the first week.
Best At-Home Teeth Whitening Kits Compared
Use this table to compare the leading kits at a glance, then read the detailed reviews below to find the one that matches your teeth, budget, and tolerance for sensitivity.
| Kit | Whitening agent | Time per day | Best for | Price |
|---|---|---|---|---|
| Crest 3DWhitestrips Professional Effects | Hydrogen peroxide | 30 minutes | Overall results | $$ |
| Colgate Optic White Overnight Pen | Hydrogen peroxide | Overnight | Easy maintenance | $ |
| Auraglow Teeth Whitening Kit | Carbamide peroxide 35% | 30 minutes | LED kit value | $$ |
| Opalescence Go Prefilled Trays | Hydrogen peroxide 10% | 15-60 minutes | Dentist-quality trays | $$$ |
| Lumineux Whitening Strips | Low peroxide blend | 30 minutes | Sensitive teeth | $$ |
| HiSmile Whitening Kit | Gentle peroxide | 10 minutes | Beginners | $$ |
| Plus White 5 Minute Gel | Hydrogen peroxide | 5 minutes | Budget | $ |
1. Crest 3DWhitestrips Professional Effects — Best Overall
Crest 3DWhitestrips Professional Effects remain the benchmark that other kits are judged against, and for good reason. The strips use hydrogen peroxide, grip the teeth without slipping, and are shaped to cover the visible smile evenly. Most people see a clear difference within three days and full results after about two weeks of daily 30-minute treatments. The strips are thin enough to wear while you talk, and the no-slip grip means you can get on with your day. Sensitivity is mild for most users, though people with very sensitive teeth may prefer a gentler formula. It is the safest default choice if you want proven, visible whitening without a tray or a light.
2. Colgate Optic White Overnight Whitening Pen — Best Whitening Pen
Colgate’s overnight pen is the easiest kit on this list to use: you brush the hydrogen peroxide serum onto dry teeth before bed, let it dry for a few seconds, and go to sleep. There are no strips to place, no trays to fill, and nothing to remove in the morning. The pen is a good choice for maintaining results after a stronger treatment, for travel, or for people who dislike the feeling of strips. It whitens more gradually than strips or trays, so expect about two weeks of nightly use for a noticeable change. The precision tip also makes it handy for touching up one or two stained teeth.
3. Auraglow Teeth Whitening Kit — Best LED Kit
Auraglow pairs a 35% carbamide peroxide gel with an LED accelerator light and reusable trays that you can heat and mold to your teeth. The kit is one of the best values in LED whitening: you get enough gel for more than 20 treatments, and the light has a built-in timer. Results are usually visible within a few days, and the moldable trays keep the gel on the teeth and off the gums, which helps with sensitivity. The trade-off is time: you need to set aside 30 minutes, and the trays need a few minutes of preparation the first time. If you want a salon-style kit at home without the salon price, this is the one to buy.
4. Opalescence Go Prefilled Trays — Best Dentist-Quality Trays
Opalescence Go is the at-home version of the gel dentists hand out after professional whitening, and it shows. The prefilled trays need no molds, no mixing, and no light: you press them onto your teeth, wear them for 15 to 60 minutes, and throw them away. The gel uses 10% hydrogen peroxide, which is strong enough for visible results in a few days but gentle enough for most people to use daily. Because the trays are prefilled, dosing is consistent every time. They cost more than drugstore strips, but for people who want dentist-grade results without a dental visit, they are worth it.
5. Lumineux Whitening Strips — Best for Sensitive Teeth
Lumineux is the kit to choose if whitening normally makes your teeth hurt. Instead of high-strength peroxide, it uses a lower concentration of peroxide with coconut oil, Dead Sea salt, and essential oils, which is far gentler on enamel and gums. The strips are designed to stay in place for 30 minutes, and most users report no sensitivity at all. The trade-off is speed: results build gradually over two to three weeks, and the shade change is smaller than with a stronger peroxide kit. If you have sensitive teeth, gum recession, or you have had to stop whitening because of pain, start here.
6. HiSmile Whitening Kit — Best for Beginners
HiSmile is built for people who have never whitened before. The kit includes a simple LED light, a whitening gel, and a straightforward 10-minute routine, so there is no learning curve and no messy trays. The gel uses a gentle peroxide formula, and the short treatment time makes it easy to stick with every day. Results are noticeable but modest compared with professional-strength kits, so it suits people with light stains or anyone who wants a brighter smile before an event. The kit is also easy to find online and often goes on sale, which makes it a low-risk first kit.
7. Plus White 5 Minute Speed Whitening Gel — Best Budget
Plus White is the cheapest way to whiten your teeth at home, and it is surprisingly effective for the price. The kit includes a hydrogen peroxide gel and a mouth tray; you apply the gel, place the tray, and wait five minutes. That short treatment time makes it the easiest kit to fit into a busy routine, and a single tube lasts for several weeks. Results are modest — expect one to two shades — and the one-size tray is less comfortable than a molded tray. But for under the cost of two coffees, it is the best budget option, and it works well as a maintenance product between stronger treatments.
How to Choose the Right Whitening Kit for You
The best at home teeth whitening kits match your teeth and habits rather than the boldest claim on the box. Use these rules to decide.
- Sensitivity: If your teeth ache when you drink cold water, choose a low-peroxide formula or a sensitive-teeth kit such as Lumineux, and avoid high-strength gels.
- Stain type: Surface stains from coffee and tea respond to any peroxide kit. Deep or gray stains may need a dentist, because no home kit removes them fully.
- Lifestyle: If you travel or hate trays, pick strips or a pen. If you want the strongest result and do not mind 30 minutes a day, choose an LED tray kit.
- Budget: A good kit costs between $20 and $60. Refill gels are cheaper than a new kit, so check the cost per treatment before you buy.
- Dental work: Whitening does not change crowns, veneers, or fillings. If you have visible dental work at the front, ask your dentist before you whiten so your teeth do not end up different shades.
How to Use an At-Home Whitening Kit: Step by Step
Follow these steps for every kit, and read the instructions that come with your product, because times and strengths differ.
- Brush and floss first, then wait 30 minutes so your gums are calm and the gel sticks to clean enamel.
- Dry your teeth with a tissue. Gel grips dry enamel far better than wet enamel.
- Apply the gel or place the strips, keeping the product on the teeth and off the gums.
- Leave it on for exactly the recommended time. Longer is not better, and it raises the risk of sensitivity.
- Remove the strips or trays and rinse with water. Do not brush for at least 30 minutes.
- Avoid coffee, tea, red wine, and dark sauces for the first 24 hours after each treatment.
- Repeat daily until you reach your shade, then switch to one maintenance treatment a week.
If you wear a night guard, check our teeth guard cleaning guide before you start whitening, because gel residue and trays can trap bacteria if they are not cleaned properly.
Common Mistakes to Avoid
- Whitening every day for months. Overuse thins enamel and causes lasting sensitivity. Stop when you reach your shade and maintain weekly.
- Using whitening toothpaste as your only treatment. It removes surface stains but does not change the color of the tooth itself.
- Whitening with untreated cavities or gum disease. Peroxide can sting exposed roots and make gum problems worse, so see a dentist first.
- Expecting veneers to whiten. They will stay the same shade while your natural teeth get lighter, which can look worse than before.
- Eating dark foods right after treatment. Freshly whitened enamel absorbs stain more easily for the first day.
- Skipping aftercare. A good mouthwash for bad breath can also help keep your mouth fresh and healthy between whitening sessions.
- Whitening children’s teeth. Whitening is not recommended for children or teenagers under 18 without a dentist’s advice. For younger children, focus on brushing habits instead — see our guide to choosing a baby toothbrush.
Frequently Asked Questions
How long do at-home whitening results last?
Most people keep their results for six to twelve months. Coffee, tea, red wine, and smoking shorten that time, while weekly maintenance treatments and good brushing extend it.
Do whitening kits damage enamel?
When used as directed, peroxide whitening is considered safe for enamel. Problems come from overuse, so follow the recommended time and frequency, and stop if sensitivity lasts more than a few days.
Can I whiten my teeth if they are sensitive?
Yes, but choose a low-peroxide or sensitive-teeth formula, use it every other day, and consider a desensitizing toothpaste for two weeks before you start.
How white will my teeth get?
Most people gain two to eight shades. Your starting shade, the type of stain, and the strength of the kit all matter, and nobody can promise a specific shade.
Are LED whitening kits better than strips?
LED light speeds up the gel but does not change the final result. The gel strength and how well the product stays on your teeth matter more than the light.
The best at home teeth whitening kits are the ones you will actually use: a proven peroxide formula, a comfortable fit, and a strength your teeth can handle. Start with one of the seven kits above, follow the steps, and give it two weeks before you judge the result. Your smile — and your confidence — will thank you.