
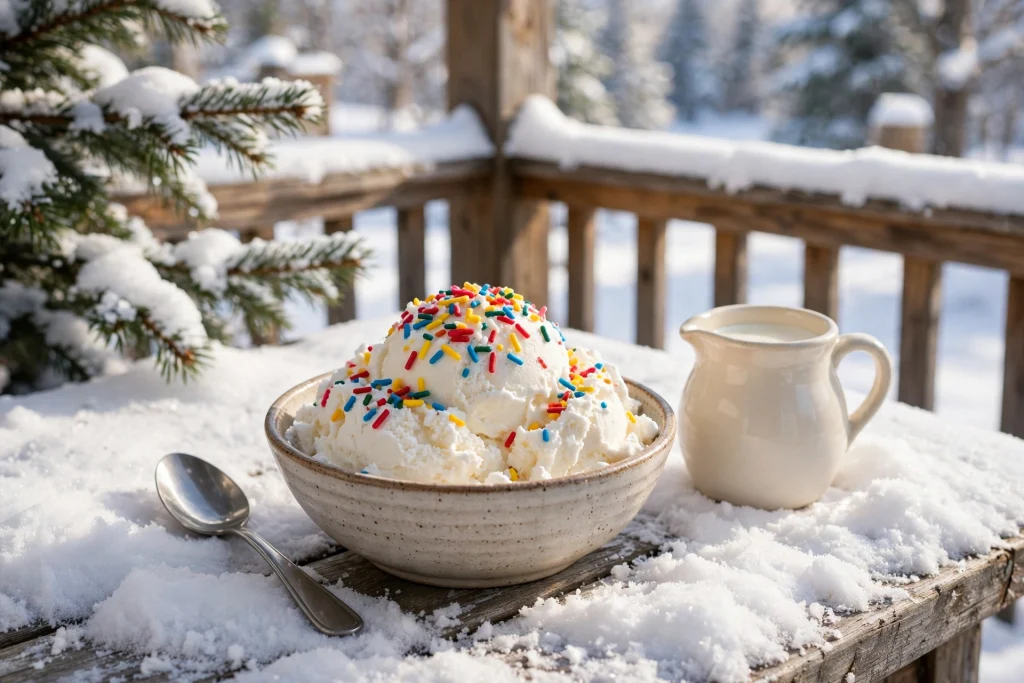

Snow cream is a simple, old-fashioned winter treat made from fresh snow, milk, sugar, and vanilla. It has the soft texture of soft-serve ice cream, but it comes together in minutes with no ice cream maker and no cooking. For many families, making snow cream is a snow day tradition: the first thing you do after a good snowfall is run outside with a bowl, gather clean snow, and turn it into dessert before it melts.
In this guide, you will learn how to make snow cream safely, the classic recipe that works every time, easy flavor variations, and the mistakes that turn snow cream watery or grainy. You will also learn when snow is safe to eat, how to store leftovers, and how snow cream compares with ice cream and other frozen treats.
What Is Snow Cream?
Snow cream is a dessert made by mixing clean, freshly fallen snow with a sweetened milk mixture. The snow provides the cold, fluffy base, while milk, sugar, and vanilla give it flavor and a creamy texture. It is sometimes called snow ice cream, and it has been made in the United States for generations, especially in the South and Midwest where a big snowfall is an event worth celebrating.
Unlike regular ice cream, snow cream is not churned or frozen for hours. You make it and eat it right away, while it is still soft and spoonable. That is part of its charm. It tastes like winter itself: cold, sweet, and a little bit magical, especially when you eat it outside in the snow.
Is Snow Safe to Eat?
Snow can be safe to eat if you choose it carefully, but not all snow is equal. Use only fresh, clean snow that fell recently and has not been touched. Collect it from an open area away from roads, driveways, sidewalks, and roofs. Avoid snow near car exhaust, salt, sand, or animal tracks, and never use snow that looks yellow, gray, or dirty.
Gather the top layer of snow, which is the cleanest, and collect it in a clean bowl as soon as possible after it falls, ideally within a few hours. If you live in a city or near a busy road, snow can pick up more pollution, so choose a clean spot in a yard or park away from traffic. If you are unsure about the air quality or the snow looks dirty, skip it and make a frozen treat from crushed ice instead.
Children love making snow cream, and it can be a fun family activity, but it does need adult supervision. An adult should choose the snow, check that it is clean, and handle the mixing. People with weak immune systems should also be cautious and may prefer to skip snow cream altogether.
How to Make Snow Cream: Classic Recipe
This classic recipe makes about 4 servings. It uses simple ingredients you probably already have, and it takes less than 10 minutes once you have collected the snow.
Ingredients
- 8 cups clean, fresh snow, lightly packed
- 1 cup whole milk, cold
- 1/2 cup granulated sugar
- 1 teaspoon vanilla extract
- A pinch of salt
Equipment
- A large, clean mixing bowl
- A smaller bowl for collecting snow
- A spoon or whisk
- Measuring cups and spoons
Instructions
Step 1: Chill your bowl. Put your large mixing bowl in the freezer for 15 minutes before you start, if you can. A cold bowl keeps the snow from melting too fast while you mix.
Step 2: Collect the snow. Go outside with a clean bowl and scoop fresh snow from the top layer in a clean area. Bring it inside right away and keep it cold until you are ready to mix.
Step 3: Mix the milk base. In a separate bowl or measuring jug, whisk the milk, sugar, vanilla, and salt until the sugar dissolves. Taste it: it should be a little sweeter than you think, because the cold snow will dull the sweetness.
Step 4: Combine. Pour the milk mixture over the snow a little at a time, stirring gently with a spoon. Keep adding snow if the mixture looks too wet, and keep adding milk if it looks too dry. Stop when the texture is soft, fluffy, and easy to spoon, like soft-serve ice cream.
Step 5: Serve right away. Spoon the snow cream into bowls and serve immediately. Add sprinkles, chocolate sauce, or fresh fruit if you like. Snow cream melts fast, so do not wait.
Tips for the Best Snow Cream
Use cold ingredients. Cold milk and a cold bowl make a big difference. If the milk is warm, it will melt the snow before you can mix it. Keep the snow outside or in the freezer while you prepare the milk mixture, so it stays fluffy.
Add liquid a little at a time. It is easy to add more milk, but once the snow cream is too wet, you cannot take the milk back. Pour the milk in small amounts and stir after each addition. Aim for a texture that holds its shape on a spoon but is not stiff.
Make it to order. Snow cream is best eaten within a few minutes of making it. If you leave it on the counter, it melts into sweet milk. If you plan to make a large batch, collect extra snow and keep it in the freezer, then mix a fresh batch when you are ready to serve.
Snow Cream Variations to Try
| Variation | How to Make It | Tastes Like |
|---|---|---|
| Chocolate snow cream | Replace 2 tablespoons of milk with chocolate syrup, or whisk 2 tablespoons cocoa powder into the milk | Chocolate soft-serve |
| Maple snow cream | Use maple syrup instead of half the sugar, and add a little extra vanilla | Sweet, warm, and light |
| Strawberry snow cream | Stir in strawberry syrup or mashed strawberries at the end | Strawberry ice cream |
| Coconut snow cream | Use coconut milk instead of regular milk and add shredded coconut | Light and tropical |
| Mint chocolate chip | Add a drop of mint extract and mini chocolate chips | Mint ice cream |
You can also try coffee snow cream by replacing some of the milk with cold coffee, or cinnamon snow cream by adding a pinch of cinnamon to the milk mixture. Keep the additions small, so they do not melt the snow or make the texture too wet.
Snow Cream vs Ice Cream vs Snow Cones
Snow cream, ice cream, and snow cones all start with something cold, but they are not the same. Ice cream is made from cream and sugar, churned while it freezes to create a smooth, rich texture. Snow cream is lighter and fluffier, because it uses snow and milk and is not churned. Snow cones are shaved ice with flavored syrup poured on top, so they are crunchier and less creamy.
Snow cream is also much faster to make. Ice cream takes hours to freeze and churn, while snow cream takes minutes. That speed makes it perfect for a snow day, when you want a treat right away and you do not want to wait for a freezer.
How to Store Leftover Snow Cream
Snow cream does not store well, which is why it is best made in small batches. If you do have leftovers, put them in a covered container and freeze them right away. The texture will change: it will become harder and more icy than fresh snow cream, because the snow melts and refreezes into ice crystals.
To serve frozen leftovers, let the container sit at room temperature for 5 to 10 minutes, then stir it well before serving. It will not be as fluffy as fresh snow cream, but it will still taste sweet and cold. Do not refreeze snow cream more than once, and do not leave it at room temperature for a long time.
Common Mistakes to Avoid
The most common mistake is using too much milk. A little milk goes a long way, and too much turns snow cream into a slushy drink. Start with less milk than you think you need and add more only if the mixture is too dry.
Another common mistake is using old or dirty snow. Snow that has been sitting for a day or more can collect dirt, salt, and other debris. Always use fresh snow from a clean area, and collect it just before you make the recipe.
Finally, do not make snow cream too far ahead. It is a serve-right-away dessert. If you make it and leave it in the fridge, it will melt and lose its fluffy texture. Mix it, serve it, and enjoy it while it is cold.
Snow cream is a fun winter dessert to share after a meal, and it works well at a family gathering. For a hearty winter dinner before dessert, try a simple main dish such as tri-tip, a flavorful roast that feeds a crowd. You can also plan a full meal with easy sides, such as the side dishes for ham in our collection, or start the day with a warm breakfast like our baked eggs recipe before heading out to play in the snow.
Conclusion
Learning how to make snow cream is easy, and it turns a snowy day into a small celebration. Collect clean, fresh snow, whisk cold milk with sugar and vanilla, and stir the two together a little at a time until the texture is soft and fluffy. Serve it right away, try a flavor variation if you like, and enjoy it while it lasts. With a clean bowl and a fresh snowfall, you can make a classic winter treat in less than 10 minutes.
Frequently Asked Questions
Can you make snow cream with any snow?
No. Use only fresh, clean snow collected from a spot away from roads, driveways, and roofs. Avoid snow that is dirty, colored, or near salt, sand, or car exhaust.
How long does snow cream last?
Snow cream is best eaten right away. Leftovers can be frozen in a covered container, but the texture becomes harder and icier. Eat frozen leftovers within a day for the best taste.
Can I make snow cream without milk?
Yes. You can use a dairy-free milk such as almond milk, oat milk, or coconut milk. Coconut milk makes the snow cream richer, while almond milk keeps it lighter. Use the same amount and add the liquid slowly.
Why did my snow cream turn out watery?
It usually means too much milk was added, or the snow was already melting. Add milk a little at a time, keep the bowl cold, and collect the snow just before you mix it. If it is already watery, add a little more snow and stir gently.
Is snow cream safe for kids?
Snow cream can be safe for kids when it is made from clean, fresh snow and an adult supervises the process. Choose the snow carefully, use clean bowls, and serve it right away. If you are unsure about the snow quality, use crushed ice instead.